Upto 50% Off On Bulk Orders
Dieline is a 2D template or a complete blueprint that highlights cuts, outlines the folds, and includes a pack of essential instructions to design a final 3D packaging box.
Packaging dieline is the most important and initial step of designing a packaging boxes for a variety of reasons such as:
Run the software, and first, add your document in Adobe Illustrator. Here, ensure the document is in the CMYK colour mode (a subtract colour mode used mainly for colour printing). This is essential to make colors optimized for prints from the start and ensure vibrant printing results. Here is the guide for adding the document in the software:
After adding the document, the next step is to start designing.
Note: As you begin designing, you may refer to the Mailer Box Orientation Guide as a guideline.
Mailer Box Orientation Guide is a diagram or template that shows how to position printed designs on a mailer box correctly. This will provide you with a complete visual roadmap to arrange graphics, text, and other visual elements on the box surface properly and accurately to avoid errors in manufacturing and printing the mailer box.
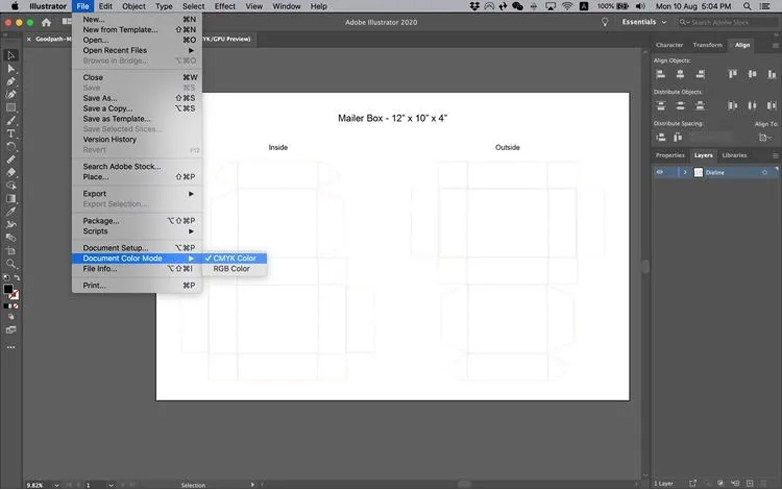
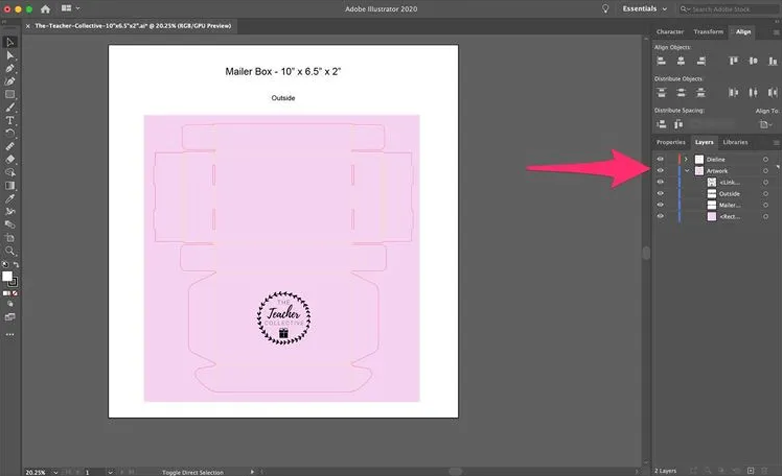
For convenience, we provide you with the accurately designed Mailer Box Orientation Guide. After attaining the file, you will need to open it. Once you open it, 2 layers appear in front of you; one is Dieline, and the other is Artwork.
Dieline: The “Dieline” layer includes cut lines, fold lines, and bleed lines that will provide a complete blueprint for where the box will be cut or folded.
Artwork: The "Artwork" layer holds the actual design you want to print on the box.
Keeping the layers separate helps you to know what design to print and where to cut the box. Moreover, keeping the artwork underneath the dieline is the best practice here. By doing this, you can see the dieline that helps to create accurate and precise mailer box dimensions and designs.
Now the work on the artwork layer is started that is positioned below the dieline. Double-check your layer placements before starting the actual design process to prevent any hassle. Here are the steps to get your mailer box ready for printing:
Create a shape around your dieline that is typically rectangular, and then fill it with the desired background color. If you have chosen a dark background, then feel free to change the dieline color to a lighter tone for clear visibility. Following is the procedure for the action:
Following are the things you should always watch while setting up your background color:
Bleeds: Ensure the selected background color covers the entire dieline area to account for bleeding during printing. This step can preclude the white edges of the box that look unprofessional.
Layers: Always keep the background shape on a different layer than the dieline for easy editing and adjustment of design.
Color profiles: Use CMYK color space for prints, while sRGB is often recommended for digital use.
To place the logo, go to “File > Place…” and select the file you want to utilize. You can also drag and drop the logo directly to your illustrator document. Scalable Vector Graphics (SVG) is used to maintain the resolution of the logo even when it is resized. It also helps in maintaining clarity when the logo is printed on different sizes of the box. Here is how you can add SVG logos:
Organization of files in the editor is essential to avoid confusion and misconceptions. Setting up the order of the files, creating separate layers, and naming them properly helps to understand what you are actually doing and also are very promising during printing.
Place your order or fill in the quote now to save time, grow your business, and get the most economical custom packaging.